Apples, Plums, and Pears…oh my!

This past spring, only 6 weeks before our sweet Ivy joined our family, we bought a home here in Bend.  My dear husband grew up here, and I’ve lived here for 12 years.  In our 10 years of marriage we’ve lived in his parents guest house, two different apartments, rented a lovely home on a storybook street just three houses away from some of our dearest friends, and even bought a home in Davenport, Iowa that we sold only a year and a half later.  While we had wanted to purchase a home here in Bend quite some time ago, home prices were outrageous, so we settled on a rental in our favorite part of town and counted our blessings!  When home prices finally started to go down and we were a bit more financially stable, we decided to get ourselves in gear and find a place of our own to call home.

We found a charming home that we loved, put an offer on, and waited 8 months for the bank to approve!  We signed papers, rushed to have the wood floors refinished (thanks Summers!), painted, unpacked, and welcomed Ivy into our new home. ♥

My favorite part of our new home is the backyard.  It’s not huge, but it’s quaint and cute with a large back deck that we ate our meals on all summer long, and beautiful, established fruit trees!  We have an apple tree, a few pear trees, and a greengage plum tree!  Late this summer, up until just a couple of weeks ago, we have been enjoying our fruit that we picked.

Aaron picked…

…and Ivy watched

…and I baked

Dimply Greengage Plum Cake


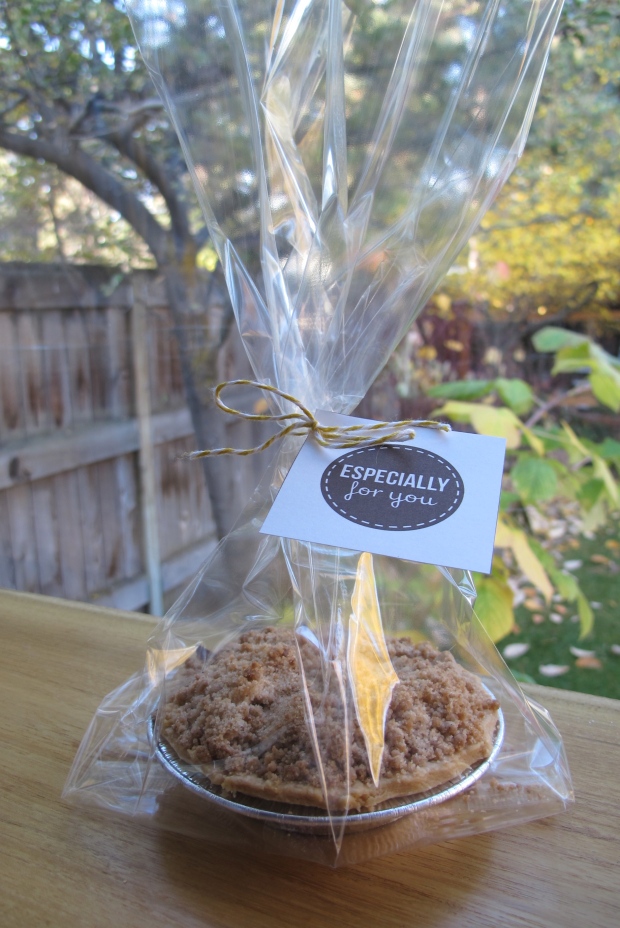
I made a delicious Dimply Greengage Plum Cake, tons of jars of heavenly Greengage Plum Vanilla Jam, and several mini apple pies!  Ivy and I had so much fun delivering them to friends and family!

Some day I can picture Ivy being so excited when fruit picking day comes.  I can see her sitting on daddy’s ladder, helping him pick apples, and then running to get her apron and stool to help me bake them into pies.  I can’t wait to see that sweet twinkle in her eye when she smiles with excitement!

Happy Fall everyone!

The biggest time waster ever…and how I plan to overcome it!

We are heading into our last true week of summer here in the Schrader household.  Aaron heads back to work next week, and we have the football scrimmage that will kick off the season at the end of this week.  The summer was fast, not long enough, and incredibly busy.  We spent loads of time with people that we love.  We took advantage of the fact that life is short and sometimes you just have to spend that extra bit of money, take an extra day off even when it hurts, stay up a little bit later even when you’ll feel it in the morning, or let things be undone in an attempt to really experience and enjoy life.

My summer has seen days of joy, and some moments of overcoming grief.  Where I’ve landed through all of it is that being angry is such a time waster.  And while knowing this should have changed my perspective on life’s circumstances, it didn’t.  Four months ago if I would have looked ahead to where my life would be in August 2011, this would not be it.  And at the very core of that statement is sadness and heartache and anger.  When I truly think about all of the implications of this, I am so thankful for a God that is merciful, full of grace, overwhelmingly loving, and incredibly patient with someone as stubborn and unchanging as me.

This past year I stumbled upon Shauna Niequist, a writer that has captured my heart with her honesty, transparency, and love for life amidst the pain.  I recently finished one of her books, “Cold Tangerines,” and have found that it has challenged me to find the extraordinary in everyday life.

I believe in a life of celebration.  I believe that the world we wake up to every day is filled to the brim with deep, aching love, and also with hatred and sadness.  And I know which of those I want to win in the end.  I want to celebrate in the face of despair, dance when all we see on the horizon is doom.  I know that Death knocks at our doors and comes far too early for far too many of us, but when he comes for me, I want to be full-tilt, wide-open, caught in the very act of life.  I think that’s what we’re here for, not for a passive, peaceful life, but to stand up in the face of all that lacks peace and demand more.

Some days I’m complacent, resistant, and heavyhearted.

Some days I demand more, I’m forward looking, I see glimpses of hope, and celebration wins.  Those are the days I am most thankful.  Thankful for hot days with iced coffee, finding a good book and not wanting to put it down, sleeping with the windows open, a Kenny Chesney song that never gets old, an M&M milkshake, a sun-kissed glow from spending the entire day at a car wash, dinner on a restaurant patio, and for friends that allow me to be painfully, brutally, ugly honest on the days that hurt.

Since being angry wastes my time, my heart is aching to celebrate any little thing I can find, even on the hard days.  And on the days where celebration is hard to come by, I’ll lean on grace.  This past weekend I joined with many others to celebrate our good friend, Pat Gonsoulin for his 65th birthday!  In his honor I baked his favorite cake!  Yellow cake with chocolate orange buttercream frosting.  This frosting was reason enough to celebrate to our hearts content!  It looked a little something like this…

With detail that looked a little something like this…

If you want to try this delightful celebration out, you can find the cake recipe here, and the frosting recipe here!  Enjoy and have fun finding something to celebrate today!

#30 Gluten Free Lemon Layer Cake

I’m done.

Glory be.  I’m done!
It’s been 30 full days of challenge, creativity, frustration, and exhaustion.  There were days where I wanted to throw my cookbooks in the trash and never look at them again.  And there were days where I came home from work wishing I could just sit and relax.  But amidst all of the things that made me want to throw in the towel there rested a single truth.

Baking continues to ease my soul.

Today I turn 30.  I have a wonderful husband who asked me to be his nine years ago.  I have parents that not only love me because I’m their kid, but actually enjoy being my friend.  I have a sister that makes me feel like I’m the greatest person in the world.  I have a brother-in-law and sister-in-law that I love being around.  I have a nephew that smiles big and says my name with pure excitement every time he sees me.  I have in-laws that treat me like I am their own, and love me dearly.  I have friends that are more near and dear to me then I could ever explain in written words.  Life is sweet, delightful, and full of joy.  Whoever said turning 30 was difficult? 😉

Life is so very good.  Thanks for following along on this little journey I started!  I hope you take some time to try a recipe from the past 30 days and make your own memory to go along with it.  Because life is about spending time with and creating memories with the people you love.  Here’s to a year ahead filled with more laughter, deeper friendships, more fun, some tears, continued healing, new experiences, greater love…and gluten free doughnuts. ♥

Gluten Free Lemon Layer Cake (recipe courtesy of “Gluten-Free Baking Classics” by Annalise Roberts)

Makes two 8 or 9 inch rounds or 24 cupcakes.  Recipe can be cut in half.

2 cups sugar

4 large eggs

2 1/2 cups Brown Rice Flour Mix*

1/2 tsp salt

1 Tbsp baking powder

1 tsp xanthan gum

1 cup canola oil

1 cup milk

1 tsp pure vanilla extract

1 tsp pure lemon extract

1 Tbsp grated lemon rind.

Lemon Curd Filling and Lemon Buttercream Frosting (recipes follow)

  • Preheat oven to 350 degrees.  Position rack in center of oven.  Line two round 9-inch layer cake pans with parchment or wax paper and spray lightly with cooking spray.
  • Beat sugar and eggs in large bowl of electric mixer at medium speed for 1 minute.  Add flour, salt, baking powder, xanthan gum, oil, milk, vanilla extract, lemon extract, and lemon rind; beat at medium speed for 1 minute.
  • Pour batter into prepared pans.  Place in center of oven and bake about 35 minutes (40 minutes for an 8-inch cake; 18-20 minutes for cupcakes) or until center springs back when touched and cake has pulled away fro sides of pan.
  • Cool cake layers in the pans on a rack for 5 minutes.  Use a small knife to cut around pan sides to loosen cake.  Invert cake layers onto a rack, peel off paper, and cool completely.
  • Carefully slice each layer in half horizontally to create four layers (this is more easily done when cake has been chilled).  Spread each of the two bottom layers with 1/2 of the lemon curd.  Cover each bottom layer with one of the two remaining top layers.
  • Place one set of filled layers on a cake plate and spread with about 1/2 cup frosting.  Place the other set of filled layers on top and cover top and sides of cake with remaining frosting.

Lemon Curd Filling

3 eggs yolks

1/4 cup plus 2 Tbsp sugar

1/4 cup fresh lemon juice

1/4 cup unsalted butter, cut into 4 pieces

1/4 tsp guar gum

2 tsp grated lemon rind

1/4 tsp lemon extract

  • Combine egg yolks, sugar, and lemon juice in a small saucepan and whisk until well blended.
  • Cook over medium-low heat until smooth and so thick that curd coats the back of a wooden spoon (this should take 5-7 minutes).  Whisk in butter, one piece at a time, until completely incorporated.  Whisk in guar gum, lemon rind, and lemon extract.
  • Pour the curd into a small bowl and cover with wax paper or plastic wrap.  Chill until very cold.

Lemon Buttercream Frosting

1 cup unsalted butter

3 1/2 cups powdered sugar; divided

1/4 cup fresh lemon juice

1/2 tsp lemon extract

2 tsp grated lemon rind

  • Beat butter in large bowl of electric mixer until light and fluffy.  Add 1 cup powdered sugar, lemon juice, lemon extract, and lemon rind; beat to blend.  Add remaining sugar and beat until creamy.

*Brown Rice Flour Mix

2 cups brown rice flour

2/3 cup potato starch

1/3 cup tapioca starch

What I love about this lemon birthday cake:  It’s mine. ♥  And it sparkles.

What I hate about this lemon birthday cake:  I couldn’t think of anything if I tried.

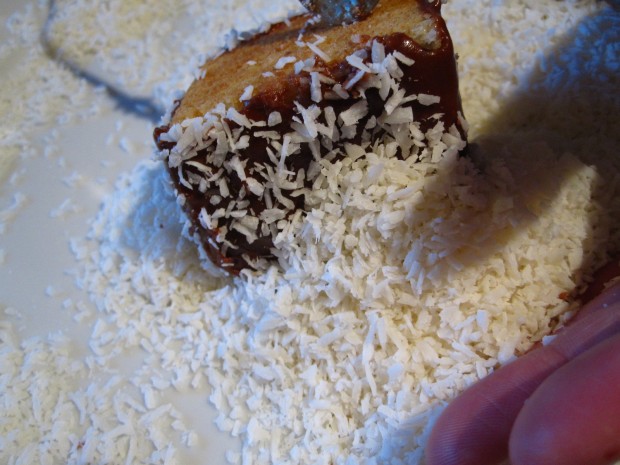
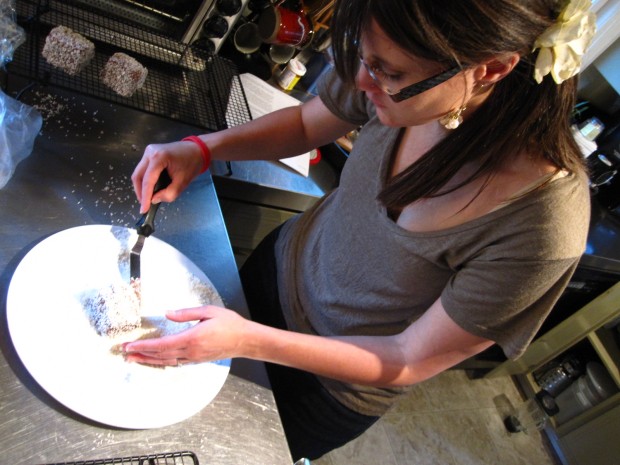
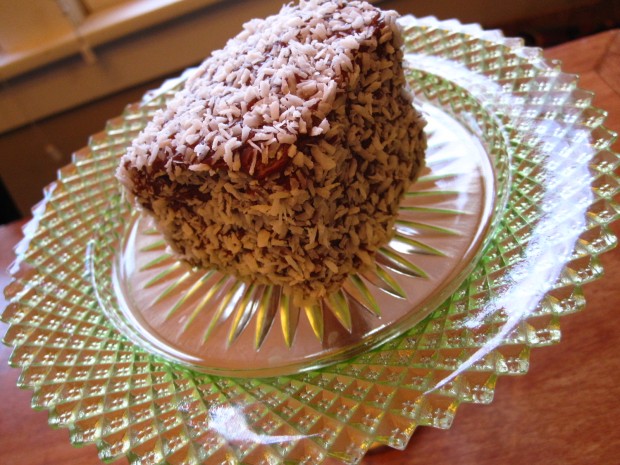
#10 Lamingtons

I first tasted these little cakes when we were over in Australia a few years ago.  We stayed with Kenn & Leanne Baker and their adorable son, Jett for a month.  We observed how they lived life in their community, and how they showed the love of Jesus in very practical ways to those around them.  Several of their friends thought it would be fun to have us try some traditional Australian foods before we left, and since I never turn food down, we jumped right on that train.  They can keep their vegemite since it tastes like death, but their lamingtons were delicious, and I’ve never forgotten them!

Finding this recipe brought back lots of memories from that month in Australia.  Such great conversations with so many different people from different walks of life.  Afternoons at the coffee shop down the street talking with Aaron about the things we were learning, what we liked, and what we would do differently.  Making new friends and spending evenings at the local pub doing karaoke and trivia night.  Watching the giant fruit bats fly around at dusk each night.  Learning how to use public transportation.  Having beet root as a side dish with every meal.  Fish & chips wrapped in paper.  Seeing kangaroos on the side of the road.  It was a good month.  Enough time has passed that sometimes I have to sit and force myself to list some of the things we did and saw so that I don’t forget.  Much of how we believe we want to live life was shaped during that month, and remembering our time there always brings me to a place of necessary simplicity.

Thank the Lord for lamingtons!

Lamingtons (recipe courtesy of Joy of Baking)

Makes 16 2-inch squares

2 cups flour

2 tsp baking powder

1/4 tsp salt

1/2 cup unsalted butter, at room temperature

3/4 cup granulated white sugar

2 large eggs

1 tsp vanilla

1/2 cup milk

Chocolate Frosting:

4 cups powdered sugar, sifted

1/3 cup cocoa powder

3 Tbsp unsalted butter

1/2 cup milk

Coating:

2 cups unsweetened desiccated coconut, finely ground

  • Preheat oven to 350 degrees and place oven rack to the middle position.  Butter or spray with a nonstick cooking spray, the bottom and sides of an 8 inch square cake pan.  Place a piece of parchment paper at the bottom of your pan.
  • In a large bowl, sift or whisk together the flour, baking powder, and salt.  In bowl of electric mixer, or with a hand mixer, beat the butter until soft.  Add the sugar and beat until light and fluffy (about 2-3 minutes).  Add eggs, one at a time, beating well after each addition.  Scrape down the sides of the bowl.  Add the vanilla and beat until combined.  With the mixer on low speed,alternately add the flour mixture and milk in three additions, beginning and ending with the flour.
  • Spread the batter into the prepared pan and smooth the top with an offset spatula.  Bake in a preheated oven for about 25-30 minutes, or until a toothpick inserted in the center of the cake comes out clean.  Cool the cake in its pan on a wire rack for 10 minutes.  Then place a wire rack on top of the cake pan and invert, lifting off the pan.  Re-invert.  Once the cake has completely cooled cut it into 16 two-inch squares.  Wrap the cake in plastic wrap and refrigerate (to make them easier to frost) for several hours or even overnight.

Make the chocolate frosting:

  • Place the powdered sugar, cocoa powder, butter and milk in a heatproof bowl over a saucepan of simmering water.  Stir the mixture until it becomes smooth and of pouring consistency.

To assemble:

  • Make a production line; put the squares of cakes on a wire rack that is placed over a baking sheet (to catch the drips).  Have ready the coconut on a large plate and the chocolate frosting.

  • Spoon or ladle the chocolate frosting over each square of cake, making sure you cover all sides.  (It is best to do only a few squares at a time).

  • With a small offset spatula or knife, transfer the chocolate covered cake to the plate of coconut and roll the cake in the coconut, covering all sides.

  • Gently transfer the lamington to a clean wire rack to set.  Repeat with the rest of the cake squares.  Once the lamingtons have set, store in an airtight container for several days.

What I love about these quirky Australian cakes:  They look like the Little Debbie snack cakes that I used to have when I was younger!  And they are extremely forgiving since they are covered in coconut, so if the chocolate icing doesn’t cover in a very pretty way, you wouldn’t be able to tell.

What I hate about these quirky Australian cakes:  They weren’t easy.  The chocolate icing was difficult to get to cover all sides of the lamington, and therefore took a long time to complete.

#1 Roasted Banana Rum Cake

Yesterday marked the first day of my 30 day challenge!
I left for work yesterday morning at 7:00am, got off at 4:30pm, went straight to the high school for this year’s cheer team uniform fitting, and walked in the door to my house…at 7:48pm.  It’s day one and all I really want to do is sit down with some dinner and immerse myself in the Modern Family season finale.  But instead I’ll be making a roasted banana rum cake.  I’m excited, ready, and completely overwhelmed!  I’m certain these next 30 days are going to be incredibly busy, and many of you are going to be sick to death of getting sweets from me, but I’m also ready for a new challenge.  So tired or not, here goes!

1. Banana…yes please!

2. Rum…do you even have to ask?

3. Cake…heck yes.

What’s not to love about this?!

Roasted Banana Rum Cake

For the cake:

3 bananas

1 package white cake mix

1/4 tsp. baking soda

2/3 cup dark rum

2/3 cup water

2 eggs

For the glaze:

1 1/2 sticks butter

1/4 cup water

2 cups sugar

1/2 cup white rum

  • Preheat your oven to 400 and line a sheet pan with aluminum foil.  Peel the bananas and cut them into one inch thick slices.  Spread the slices around evenly on the pan.

  • Bake about 20 minutes, or until brown.  Let cool and lower the oven to 350.  Grease a bundt pan.
  • Place bananas in a large bowl and mash them with a fork.  Add the cake mix, baking soda, rum, water, and eggs and mix until smooth.  Pour into the bundt pan and bake for about 45 minutes, or until a toothpick comes out clean.
  • When the cake has about 10 minutes left to bake, start the glaze.  Start by putting the butter in a medium saucepan over medium heat to melt.  Add 1/4 cup water, and 1 1/2 cups sugar.  Stir together and bring to a gentle boil.  Continue cooking for 4-5 minutes, stirring occasionally.

  • Turn the burner off and add the 3/4 cup rum.  Stir together and turn on the burner for about 30 seconds to give it a quick boil.  The mixture will be pretty thin, but syrupy.
  • Once the cake is out of the oven, while still bottom side up, drizzle about 1/3 of the glaze over the cake, with the intent of getting the cake as moist as possible.  Drizzle it on slowly, letting it seep in, and allowing it to run down the sides of the cake as well.  Let it sit for about 5 minutes, giving it a good chance to completely soak in.  After 5 minutes invert the cake onto a cake plate.
  • Next prick the cake all the way around the top and sides with a fork.  This is an important step to make sure that the glaze seeps into the cake really well.  Begin slowly drizzling the glaze all over the cake, allowing it to drip down the sides.  Some of this will end up pooling at the bottom of the cake, and that’s okay.  Allow the cake to cool to room temperature so it has plenty of time to soak up the rum glaze.
  • Lastly…enjoy!

Here’s what I love about this cake…it is so stinking easy!  It uses a box cake mix, which normally I try not to do, but considering how exhausted I was when I got home, it was a welcome compromise.

Here’s what I hate about this cake…

To be fair, it’s not the cake that caused this catastrophe. I should have known better.  I have had problems with my bundt pan every time I’ve used it.  I own a stoneware bundt pan from Pampered Chef and I hate it.  My cakes always stick, no matter how well I grease it beforehand.  However, I’ve made many bundt cakes in my married life with normal metal bundt pans and they work excellent, so I have every reason to believe this heavenly smelling cake would have come out perfectly had I used a different pan.

Double sigh.  What a way to start!  Here’s to hoping this isn’t an indicator of the next 29 days for me.  Onward to day 2!

Cake Pops!

Life has been a little bit of a whirlwind and sort of tipped on its side lately.  Trying to find a good landing place, I figured baking would most likely drop me exactly where I needed.  I’ve been wanting to try some new cake pops for awhile, so I decided to create some pretty yellow ones to remind me of what the end of April is supposed to be like…sunny and springy.

Unlike the snow we woke up to last week.

No really, I’m not bitter at all.  This is Central Oregon, right?  It’s like this every year, right? The great summer makes up for the disgustingly long winter, right?

*Double sigh*

I’ve essentially made these before, but without the sticks that turn them into “pops.”  I call them cake bon-bons, and they look like this…

They are easy to make, pretty, and the perfect amount of cake!

But since cake pops are all the rage I decided to put some sticks in them and see how it went.

Don’t let this picture deceive you…I’m fairly certain these are the only three that turned out.  I really hate working with Wilton Candy Melts.  I’m desperate to know if there is any easier way to work with the round colored discs that continually make me want to pull my hair out.  Does anybody know the secret to these things?  They only stay melted for a couple of minutes and then they start to harden to the point that they don’t want to dip cleanly.  And the white drizzle on top…that was a whole other episode of angry.  Either way, these few were cute and ridiculously delicious.  My love/hate relationship with the candy melts won’t keep me from continuing to make them, but it will most likely make me use some language I won’t be proud of.

Try them out and let me know how they worked for you!  Maybe you’ll be blessed with the gift of making candy melts stay melted.

Cake Bon-Bons or Cake Pops!

1 prepared 9 x 13 cake (I use a box mix because it hold together easier, and or the ones pictured above I used a gluten-free mix so I could enjoy them too!

12 oz. ready-made frosting

20 oz. candy melts

  • Bake cake according to instructions.  Once the cake has completely cooled, use your hands to crumble it into a very large mixing bowl.  If you want the final result to be prettier, skim off the brown from the top and sides of the cake before crumbling it.
  • Stir in enough frosting to make the cake crumbs stick to each other and be able to hold a shape, but not so much that they are gooey and overly sticky.  About 3/4 of a 12 oz. tub should do the trick.
  • Line a cookie sheet with waxed paper.  Using a cookie scoop or your hands, form the cake mixture into balls.
  • Put the cake balls into the freezer for about 10 minutes.  This will help them stick together better when you are dipping them.
  • Melt the candy melts according to package directions.  Pour the melted candy into a deep bowl.  It needs to be deep enough to cover the entire cake ball.
  • Take the cake balls out of the freezer.  Gently roll them with your hands to get rid of loose crumbs.  Using two spoons, dunk each ball into the melted candy.  Cover the entire ball in one continuous motion.  Place back onto the wax paper to dry.  If desired, you can decorate with another color of melted candy melts on top.
  • Place a candy stick (available at most craft stores) into the top of your cake bon-bon.

Guns, lamb cake, and Amazing Grace

I love Easter!  I love that it’s in the Spring, I love that it involves a silly tradition of dunking hard boiled eggs in dye,  I love that it justifies eating one too many Cadbury creme eggs, and most of all, I love what it signifies for ME.  That Jesus loved me so much, despite the huge amount of flaws that I have, and my long list of mess-ups, that He died for me.  I can’t fathom love like that.

This weekend was filled with things that I love so much, and was a sweet reminder of how much my Jesus cares about the little things.  Or rather, the things that probably seem little to others, but meant the world to me.  It was a weekend of laughter and joy, relaxation and anticipation, and good, meaningful time with some of my favorites!

It started with this…

I’ll be honest in saying that time with friends restores my soul many times.  It’s like medicine to a bit of brokenness, and I love that when I need it most, Jesus is so faithful to provide.  We spent 9 hours with these two wonderful people, and I selfishly feel that it was completely for my benefit. 🙂

In the midst of all that gun shooting fun, I made this kitschy cake to make Grandma Wilson smile!

She used to make this lamb cake every Easter for her grandchildren, and a few months ago she gave me the cake mold.  It’s from the 1950s and is totally vintage looking.  She spent Easter with other family members this year, but I was excited to make it so she could see pictures anyway!

Our weekend ended with these hopeful words to Amazing Grace being sung

The Lord has promised good to me.

His word my hope secures.

He will my shield and portion be,

As long as life endures.

Because of Him, I have hope.

Giddyup!

I love cowboys.  I love the idea of cowboys.

Maybe it’s my roots of growing up in Sterling, Colorado.

Sterling, Colorado

The multitude of ranches, cowboy wear, the permanent smell of cows, or the annual Cowboy Ball.  Maybe it started in first grade when I met my childhood best friend whose father owned a feedlot.  It’s possible that the fact that everyone dressed in cowboy hats and boots during the Logan County Fair, even if you didn’t don them for the rest of the year, encouraged my affinity for cowboys.  Regardless, I have some favorites that I wish I personally knew.

Brad Paisley

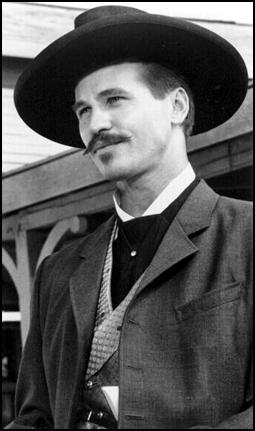
Val Kilmer as Doc Holliday

George W. Bush

Clint Eastwood...yes please!

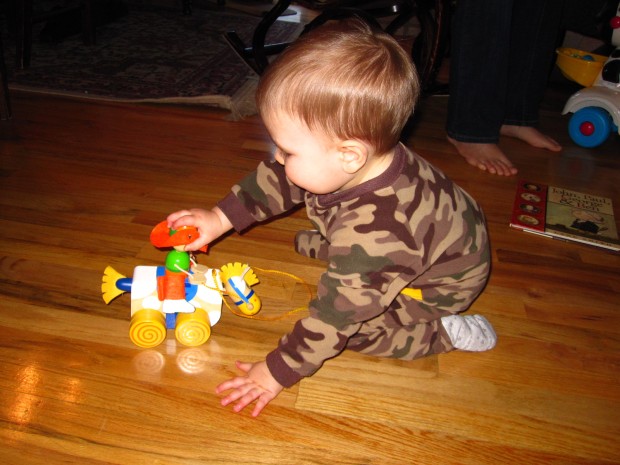
I don’t possess any kind of cowboy/girl skills.  None whatsoever.  In fact, it would probably be safe to say that I would fail at those just as hard as I fail at most sports.  But I’m intrigued with the lifestyle of a real cowboy.  Even my poor nephew is destined to have a toy chest full of cowboy themed toys because of me.  This was what he got for his first birthday:

Pull-Along-Cowboy!  This cool wooden cowboy pull toy kicks up his heels as the horse’s wheels turn.  Brilliant!

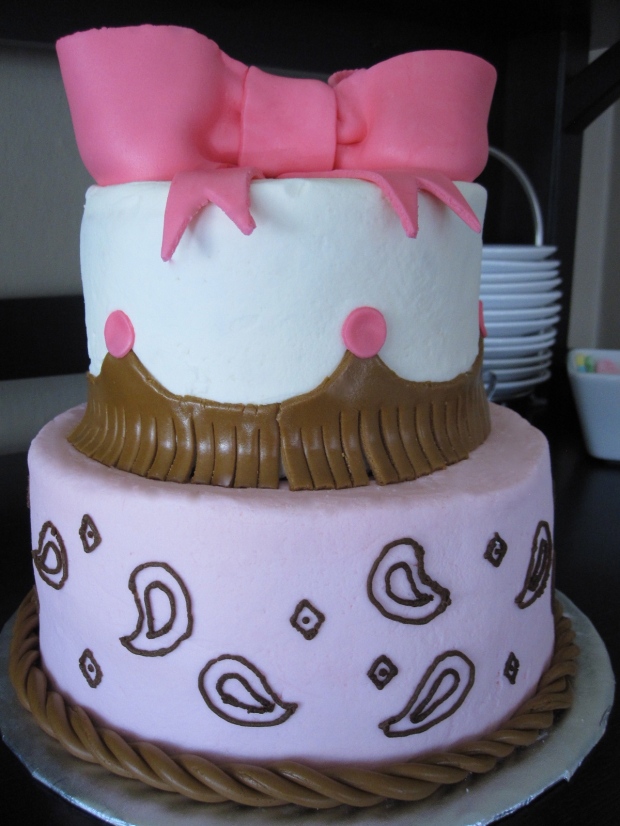
You can imagine my excitement when my dear friend, Emy, asked me to make a western themed birthday cake for her 10 year old daughter’s birthday party.  Boy howdy and giddyup!  I was all over it.

Cute!  Thanks, Emy, for letting me be a part of your sweet girl’s birthday!

Cake specifics:

Cake–vanilla

Filling–pink buttercream

Frosting–pink and white buttercream

Rope/Fringe/Bow–marshmallow fondant


Sometimes Life is Funny

If you would have told me 15 years ago that I would be celebrating the upcoming birth of my childhood best friend’s baby girl, I wouldn’t have believed you.  But sometimes life is funny that way.  Sometimes you and the person you spend every waking moment with as a little girl end up finding new best friends and end up going in different directions. I’m so glad that regardless of new friendships, different colleges, different careers, and different states, sometimes friendships last.  And I’m so thankful that every once in awhile life brings you back into each others lives.

Laura and I met in Mrs. Anderson’s first grade class at Hagen Elementary in Sterling, Colorado.  Here’s some of the very things that I loved about Laura in 1987:

  • She had freckles.
  • Her family owned a feedlot but since I didn’t really understand what that was at the time, it just seemed like a big farm.
  • Her family took vacations and sometimes took me with them.
  • She got to listen to Madonna and Vanilla Ice, both of which I was forbidden to listen to.
  • She had a trampoline.
  • She had the same love for animals that I did (frogs, crickets, dogs, birds**)

We were the best of friends for several years.  In high school we migrated into new social circles, and then made our way to different colleges, several states away from each other.  Nearly ten years later Laura found herself moving to Portland, Oregon.  These are some of the very things I love about Laura in 2011:

  • She is extremely genuine.
  • She is completely unafraid to laugh at herself.
  • She’s tall but isn’t afraid to wear heels.
  • She has a really awesome husband.
  • She’s brilliantly talented and incredibly humble.

And now life is moving her thousands and thousands of miles away again.  Sometimes life is funny that way.

So when she asked me to make the cake for her baby shower before her big move, I felt blessed, lucky, and incredibly thankful that I was in a place, geographically, that it was possible.

She asked for a pregnant belly cake.  I had never seen one before, but I was smitten from the first picture I saw, and couldn’t wait to create one just for her.

It was a sweet day.  I got to catch up with her beautiful mama who I haven’t seen for almost a decade.

I was overwhelmingly excited to have been able to have lovely conversation with her wonderful sister-in-law who has become a close friend of mine over the past couple of years.  And I got to share in her joy as she celebrated her soon to be born baby girl.

Happiness!

**Laura, PLEASE tell me you remember the birds…you know, the ones we “saved” from the thunderstorm?

Sparkles!

I have an obsession with glitter.  Anything that sparkles, really.  It just makes me feel ready for something big!  Even my sister has taught my clever nephew that when asked, “What does Nie Nie say?”, that the correct answer is “Sparkles!”

Like these, for instance…

Sparkly shoes are one thing, but add to that, the fact that they are TOMS, and that’s a whole new level of awesome!  I very badly want to sport these lovely kicks.

And this stunningly feminine dress…swoon!

Seriously so gorgeous!

And this fabulous satin head wrap!

Point made.

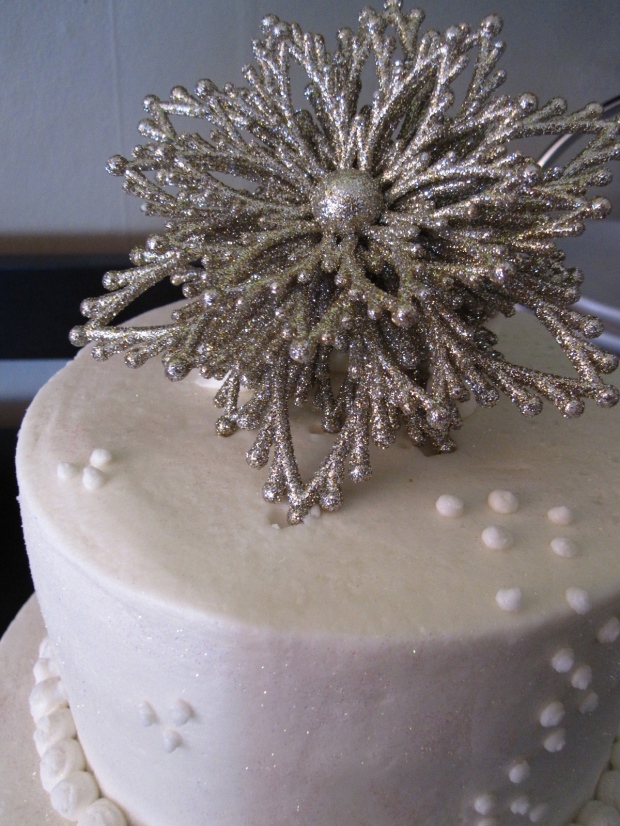
So you can imagine my excitement when I was asked to create a small wedding cake for the winter themed wedding of a young giddy couple in love.  I knew that given the opportunity I could go way overboard, so I tried my best to not be completely ridiculous.  And this was the result…

I found that lovely sparkly snowflake topper at Target during Christmas this year, and was instantly in love with it.  So elegant and beautiful!  What a pleasure to have been a part of such a stunning event!  Thanks to newlyweds, Clif & Michelle, and their unbelievably talented wedding designer, Angie!

Cake specifics:

2 stacks (one 8″, one 6″), 3 layers in each stack

White cake

Raspberry filling

Classic Buttercream frosting